Hello Darts, I Shall Manipulate You
Lol, the title of this post seems so sinister, doesn’t it?! Well that’s what I did! Manipulate the darts. The bodice sloper class is still fresh on my mind so I was eager to play and experiment with dart manipulation.
Other than the SBA I did on the Monet Dress, I haven’t really done much with darts. I’ve mostly been focused on draping. But flat patterning is just as important. After all, a flat pattern needs to be created based off the drape before you can sew anything.
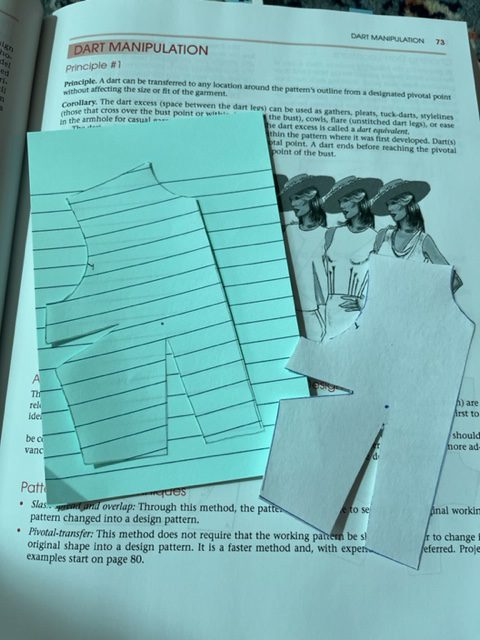
Besides look at the pictures, I’ve owned the “Patternmaking for Fashion Design ” textbook by Helen Joseph-Armstrong for over a year but never actually done anything with it. That all changed yesterday!
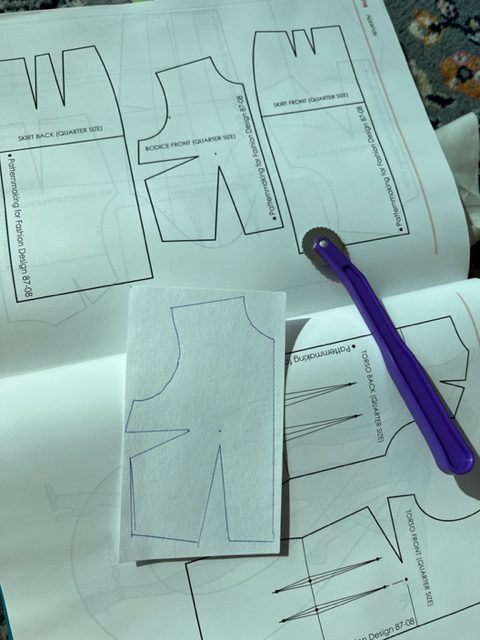
In the back of the book there are half scale and quarter scale sloper patterns that you can use for the exercises. It also includes directions on how to make custom slopers based off your measurements. For this exercise I used the quarter scale, which trace perfectly on a 3×5 index card. (Or you could just make a bunch of photocopies.) Now that I have accurate measurements of myself that we took in class, I will use them in the future to create the skirt, pant and sleeve blocks.
I basically just flipped through the book and made the designs I thought looked cool. This is my usual learning method, lol. First things first though. My personal custom bodice sloper was created with 2 darts- a waist and side bust dart. Lots of the exercises start with one dart, so I will need to create a 1 dart bodice. (The book has a 1 dart bodice you can start with)
These are the exercises I learned:
#1: Create a 1 dart bodice using a 2 dart bodice
This one was actually pretty easy. Just move that left side up to close up the side bust dart. The excess will get added to the waist, creating 1 dart only. For checks and balances I compared it to the quarter scale example. It matched.
You can move that single dart all around the bodice, just cut open where you want the dart to be and close up the rest.
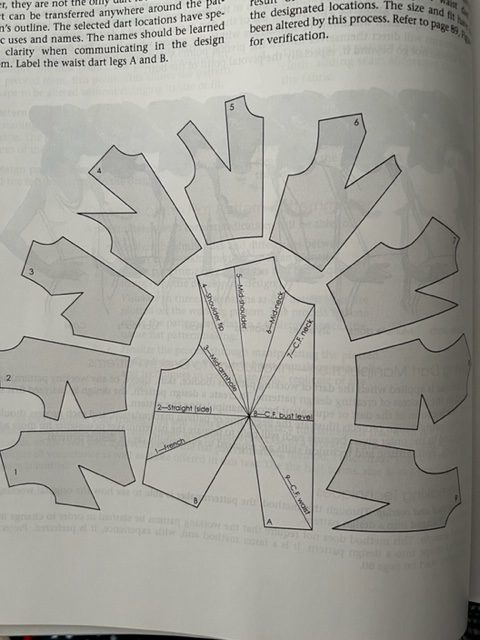
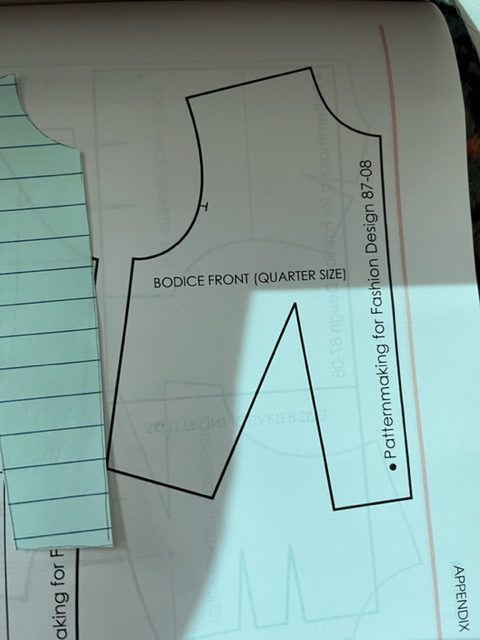
#2: Two dart pivotal transfer. Mid-neck
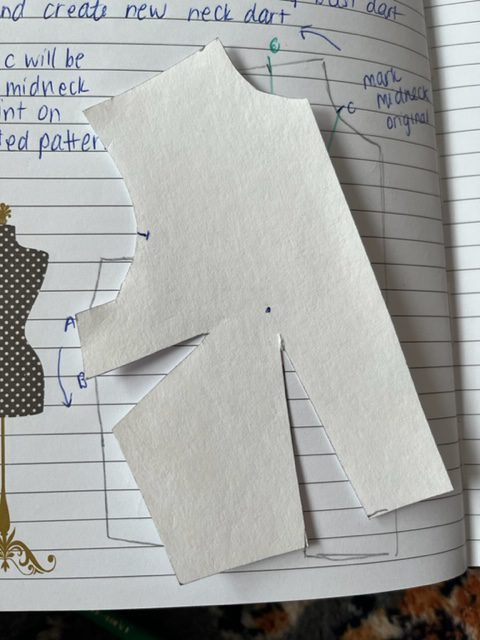
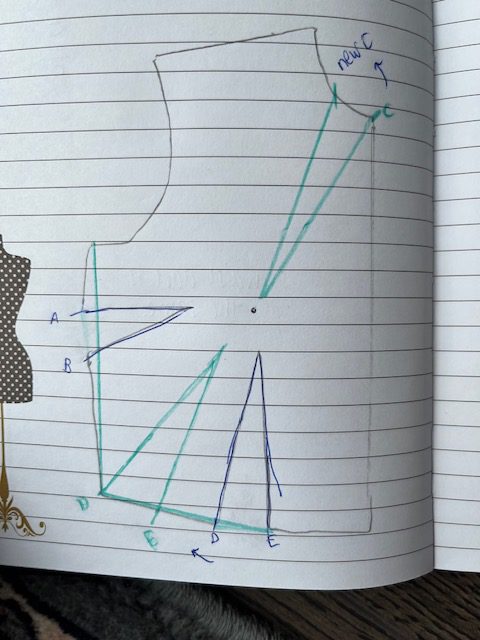
Here’s where the “manipulation” really happens. First I traced the original onto paper. I then stuck a pin in the bust point. (That was fun! ) I marked “C” where I wanted the new dart to start on the neckline- in this case mid-neck. Then I labeled the existing side dart legs A & B. Rotate/pivot the original template to the left until A meets B, which effectively closes up the side dart. The other leg of the new dart C is the point where the template’s mid-neck hits after turning it.
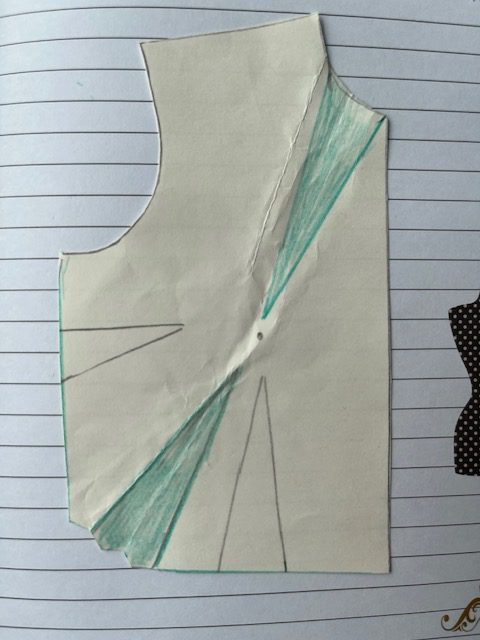
I am not sure I explained that very well but that’s what I did! I basically just followed the directions in the book. Here’s a visual. The side dart moved to the top and became a neck dart. The waist dart didn’t move.
I really like the way this one looks. Darts near the neck add visual interest and eliminates the need for a necklace.
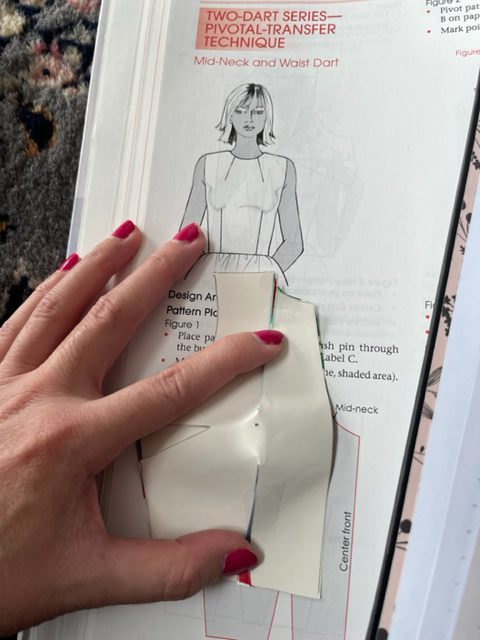
#3: Two dart pivotal transfer- Mid-neck AND waist
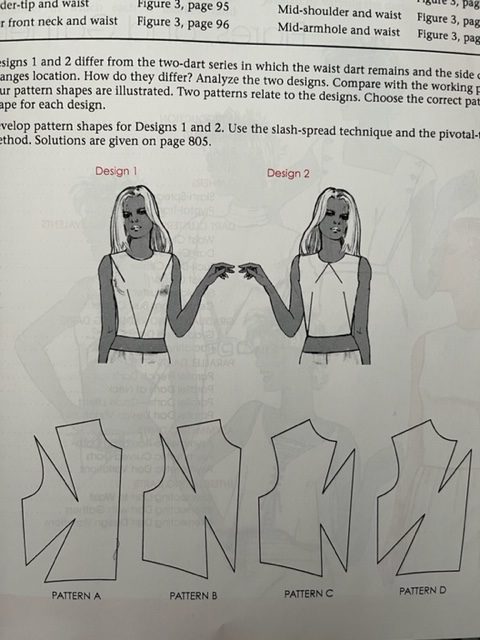
Ok, so this one was a practice problem. You have to choose which pattern A, B, C or D corresponds to Design 1 and Design 2. I chose to create Design 2.
Both the bust and waist darts move using the same pivot method. The side dart moves to the top and the waist dart moves to the corner. I find sticking a pin in it so satisfying, lol. It’s like turning back a clock or spinning a top!
The answer is Pattern D. And in case you’re wondering, the answer to Design 1 is Pattern B. 😉
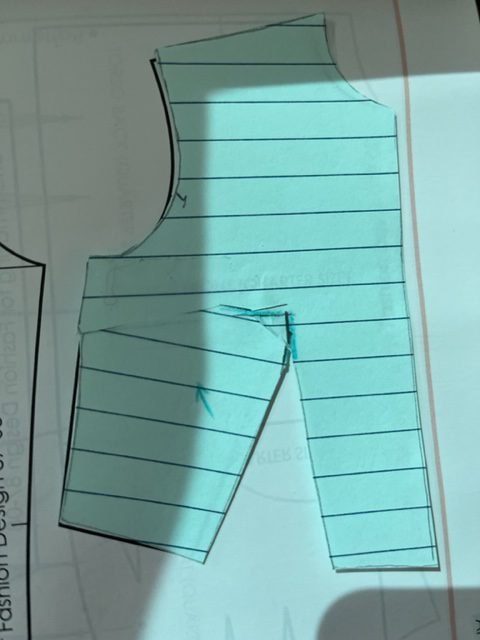
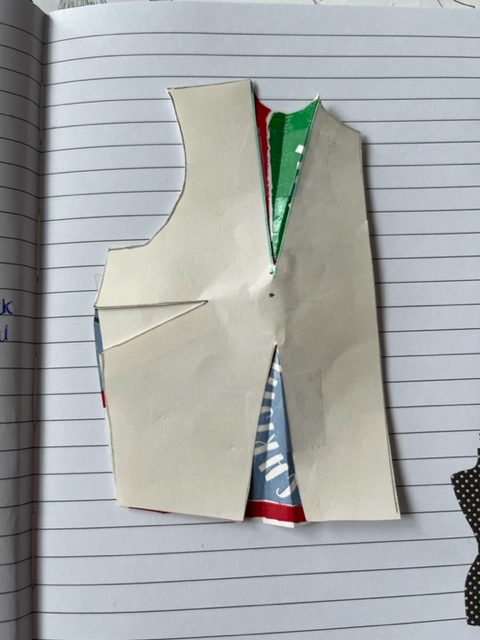
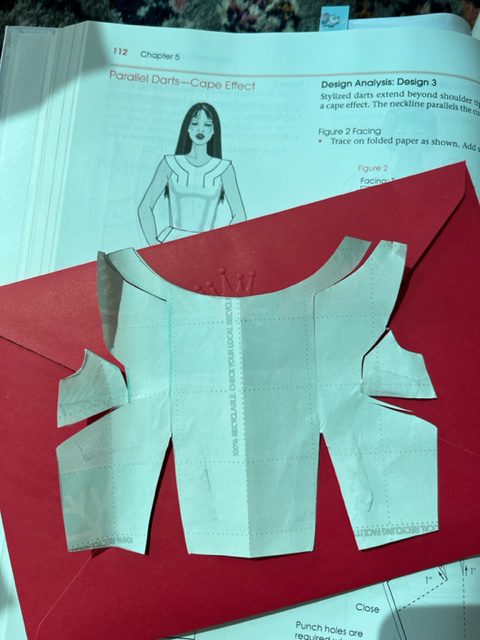
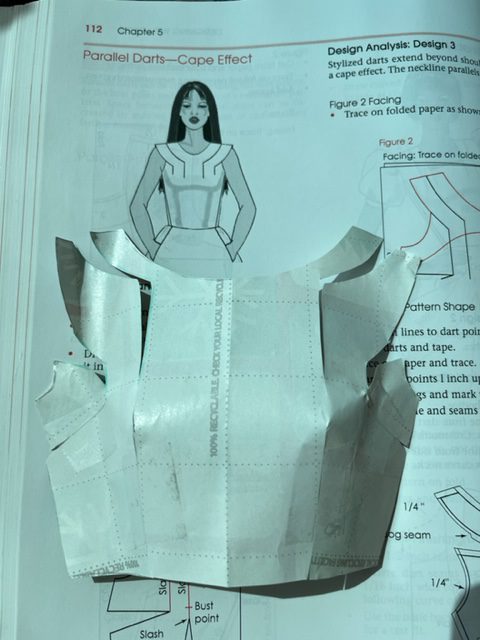
#4: Parallel darts. Cape Effect from 2 dart bodice
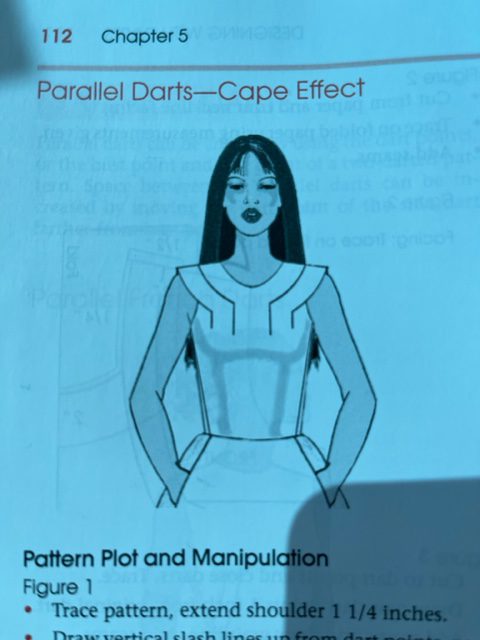
I have to admit I started with this one first, lol. It’s the most interesting and the most complex out of them all- I can’t help myself! The book tells you step by step what to do and it looks more complicated than it was.
This one has a bit of a sleeve so you extend out the shoulder line. You can see my revisions in green. It also has a lower neckline so you draw in the new neckline. The rest is drawing in where you want the darts to be and cut. This is called “slash and spread”.
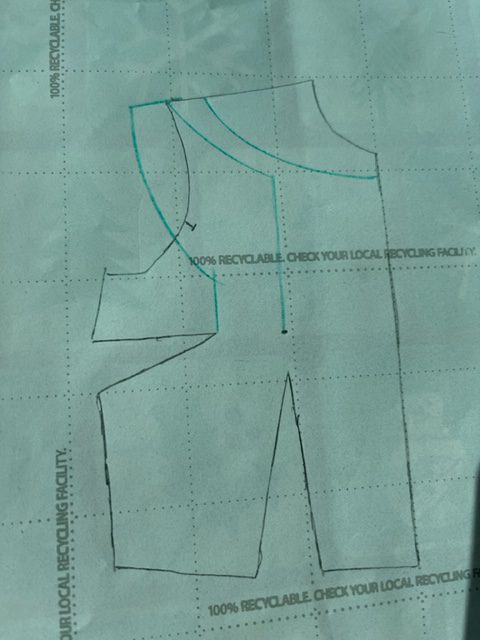
Once the neckline part is spread, the waist and side darts get closed up! The final flat pattern looks a bit crazy, but when you put it all together you can see where the curved lines happen around the neckline. It’s actually REALLY REALLY neat.
The biggest thing to remember for dart manipulation is that you have to draw a line at the location where you want the new dart. Cut that line aka “slash” and move everything around it to close it up. There are many more exercises (like adding fullness) that I will practice soon. I am liking this textbook a lot….especially now that I know how to read it. I feel like I just discovered a New World.
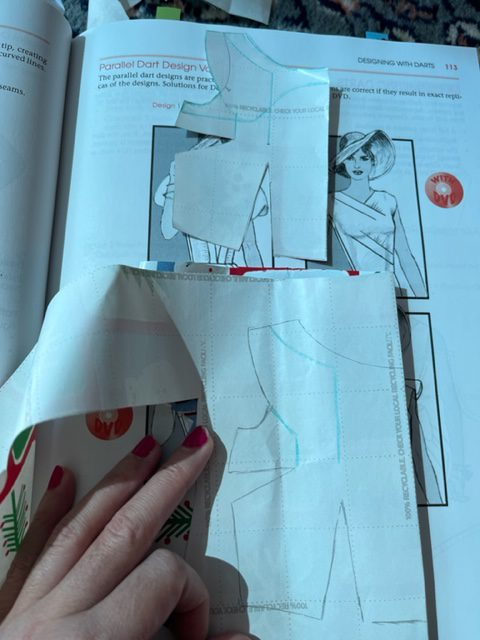
Experimenting with my quarter scale slopers made me feel like a little kid playing with paper dolls. It was such a fun afternoon and brought me the same kind of joy! I might even sew some of the mini patterns using scraps so I can see what it looks like on fabric. I’m a major paper person and used to be scrapbooker/ junk journaler, so I am documenting and gluing all my mini patterns into this new notebook, aka “glue book”. I’m excited to fill this one up with design inspo and more exercises from the textbook.

Now that the designs are complete I can apply those same methods to my full size custom sloper. It’s crazy to think in a matter of hours I created four new bodices without actually sewing a thing! I’m really liking the flat pattern method for that reason. Since these are quarter scale the pattern making process is completely portable. Everything you need can fit in a pencil case! I can see myself doing this on a long flight somewhere or while watching tv. You could get really slash happy Edward Scissorhands style and create all kinds of designs.

Unlike the draping method where you stand with a full size dress form and move fabric around, flat patterning is 2D and on paper. Draping is 3D and very visual- what you see is what you get. With flat patterning you’re still creating and designing, just on a smaller scale. It’s a different way of thinking and creating. One isn’t better than the other. I find both methods incredibly fascinating.