
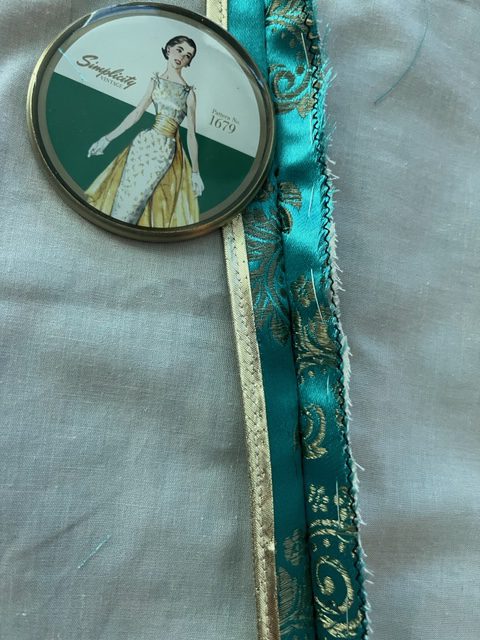
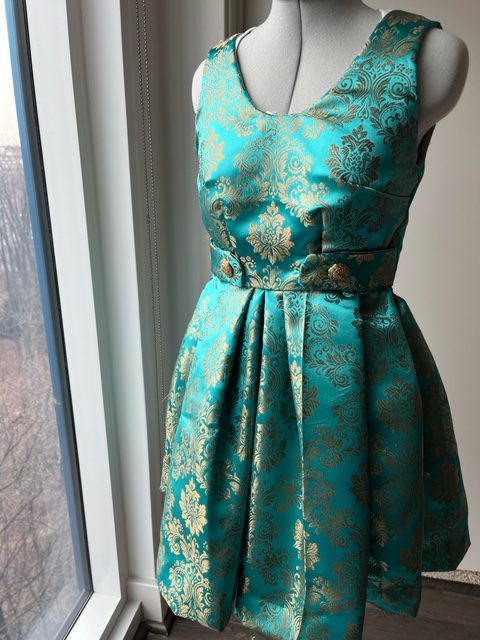
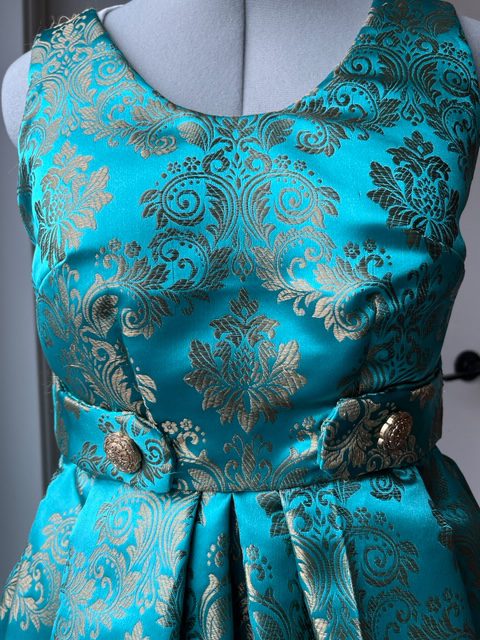
Simplicity 1873: Monet Dress
Well my January project is finally done….in February! Lol
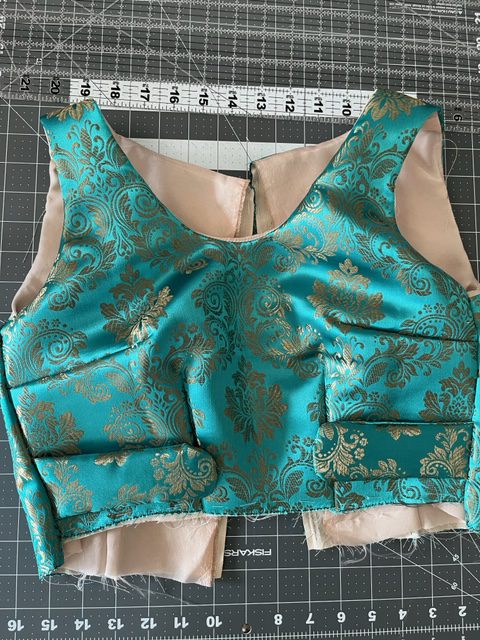
I put my holiday reading into practice on this dress, with lots of “firsts” in couture techniques. Committed to using stash fabric, I used stash brocade, which was a win…until it wasn’t. The dress is a “Monet.”

Now this certainly isn’t a dig on Monet, just that the dress looks much different up close. (I actually find Monet paintings quite beautiful) What do you mean, you ask?! Well first let’s talk about all the great things before the “not so great” things. 😉
Things that went well:
- I did a SBA for the first time, closing it up 1/4″, and YES this was life changing. That combined with adjusting the width and location of the darts, I feel like it is the best fitting bodice I’ve ever made! I also closed up the neck gaping by creating a new center front. (Removing center front neck gaping p. 113- Gertie’s New Book for Better Sewing) Totally worth the effort to spend the extra time in the fitting stage.
- Couture dart method. I have problems sewing pretty darts. Mostly they are inconsistent. This time I sewed from the tip down, joining the bobbin thread to the top thread. Makes a significant difference in how they look! So so glad I learned this. ( Couture Dart p. 101– The Dressmaker’s Handbook of Couture Sewing Techniques by Lynda Maynard )
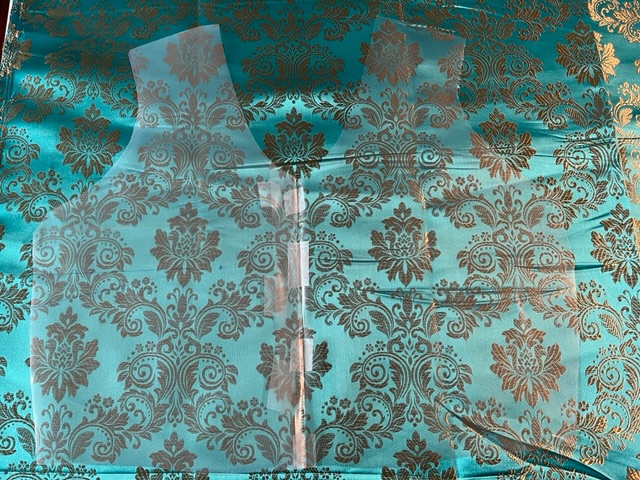
- I used clear plastic sheet protectors to cut out the shape of the bodice so I could get the gold around my neckline. I got this tip from Alisa Shay from Thoughtful Creativity on YT. Unfortunately I don’t remember which video it was, otherwise I’d link it here. But this was so very helpful.
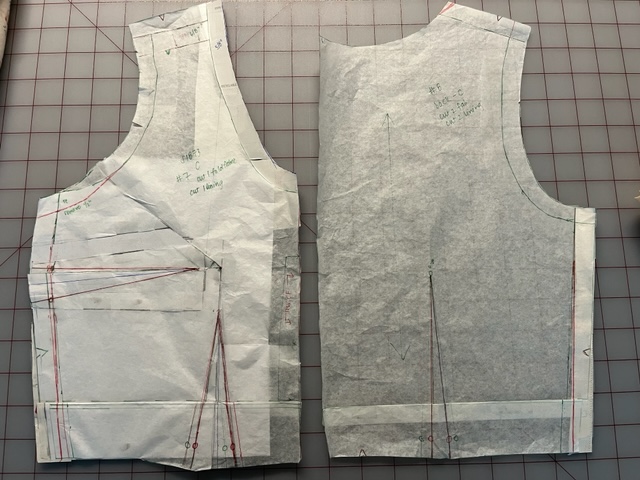
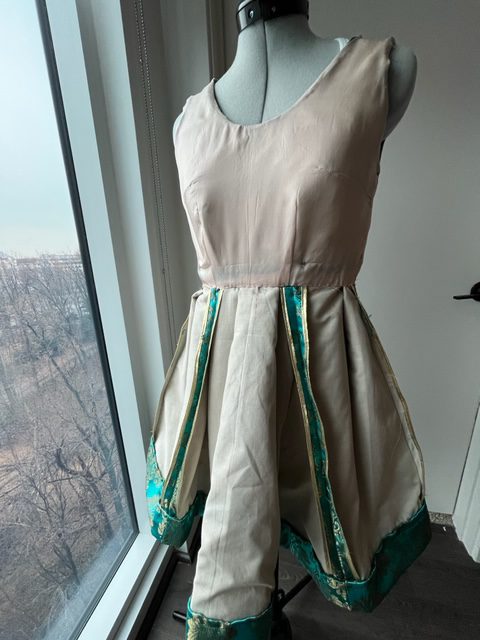
- Underlining. I underlined all the pieces using cotton batiste and hand basted using silk thread and a John James needle. This was time consuming but needed it for comfort. (Underlining p. 145- The Dressmaker’s Handbook of Couture Sewing Techniques by Lynda Maynard)
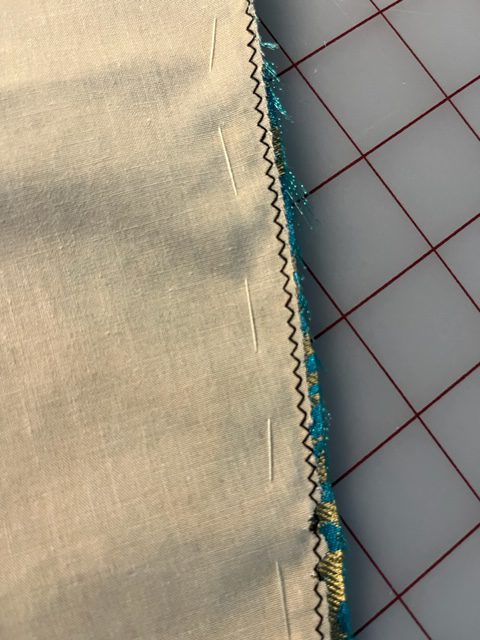
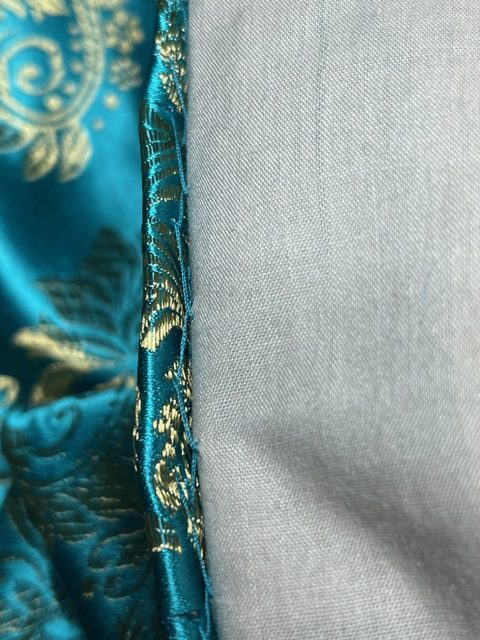
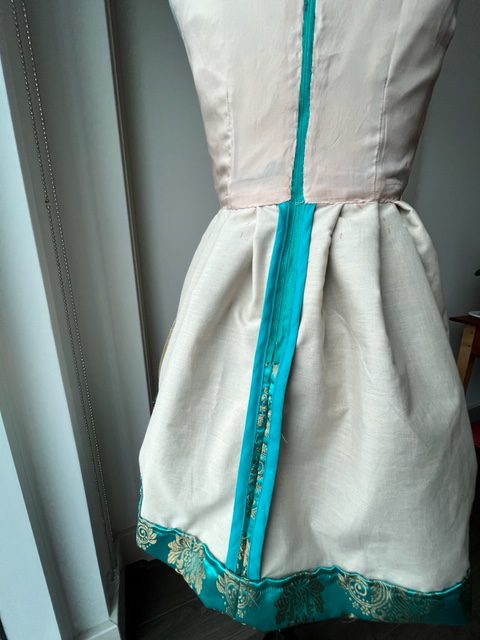
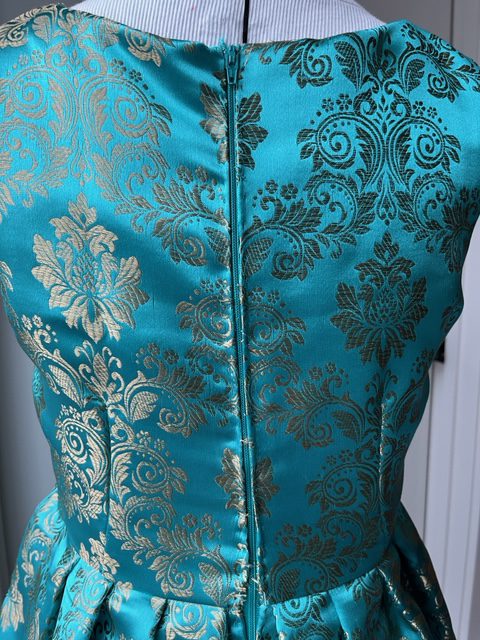
- Hong Kong finish. I used stash gold and turquoise bias tape. I had to chuckle at how “extra” that gold made it look. Nobody will ever see it; I am more proud of the inside of the dress than the outside.
- Bemberg rayon lining. I had read a lot about this material and used it in the bodice. It really does look professional and clean on the inside. It was a little squirmy to cut but no biggie. It’s so smooth against the skin- I am a fan!
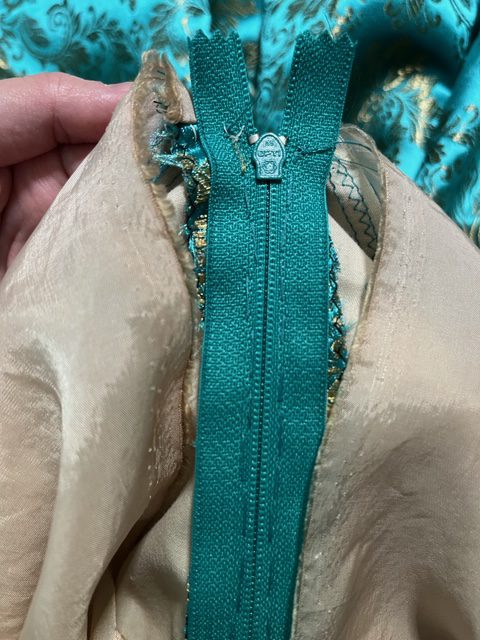
- Handpricked zipper. I think this will be my “go to” method from now on. It was much easier to get the placement right since it was hand sewn in. The stitches look pretty neat and sure beats seam ripping a mistake sewn by the machine. ( Handpicked zipper pg 56- Gertie’s New Better Book for Sewing. Visual: how to insert a zipper by hand using couture technique – YouTube)
- Blind catch stitch hem. This is a new stitch for me, kinda. I didn’t realize what I was doing before with the lace hem tape was similar…but this one I hand stitched on the inside of the hem fold. Eliminates the need for the lace. This could also be a “go to” from now on.
Fanciest seam I ever did sew 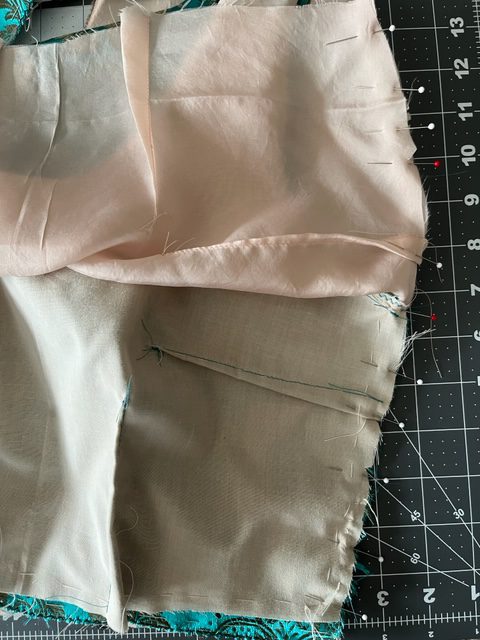
Seeing this stitching is so satisfying
- Handstitching in general. Between underlining, handbasting the pleats, slipstitching the lining, handpricking the zipper and blind catch stitch hem I got A LOT of practice handsewing and I can tell my nondominant left hand is getting stronger! BTW, how much hand sewing do you have to do in order for something to be called a “Couture dress”??

Pleat basting 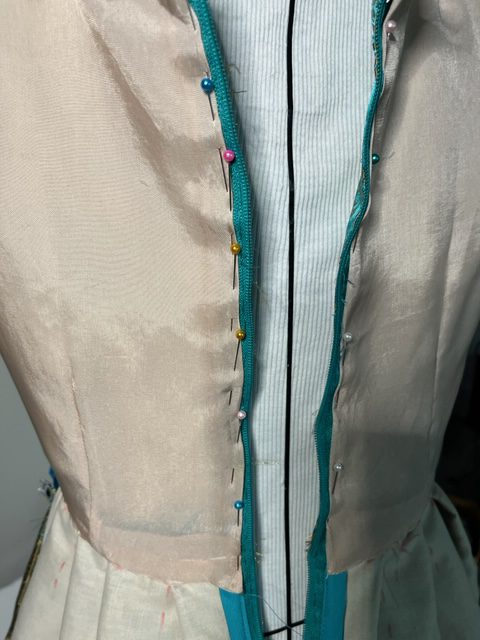
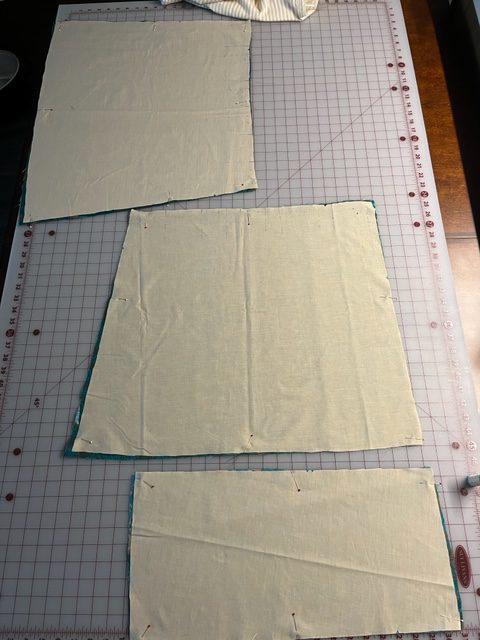
Lining prep 
Slipstitched lining- not bad at all! And that dart is perfection.
What went wrong:
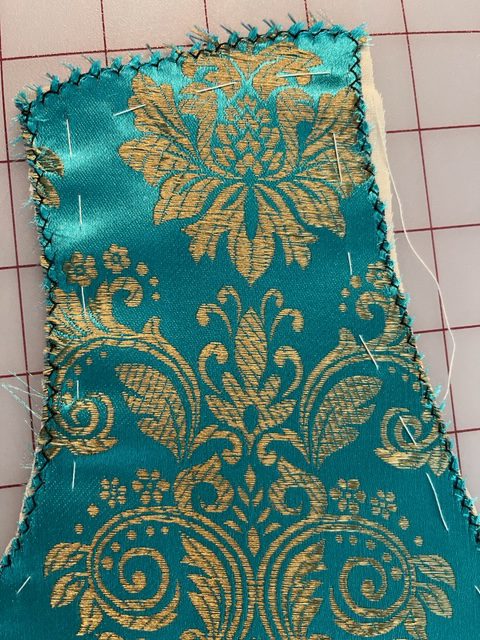
- FABRIC. Yes, although beautiful, this fabric was TOO loosely woven and is extremely snag prone. If I could douse this thing in fray check I would!! The threads come out just by handling it so I don’t forsee this dress lasting more than 2 wears. You can’t see it from afar, but if you look closely you can see those scragglers in all their pulled glory. BAH! That’s why it’s a “Monet”. ::cue sad violins::

Holes 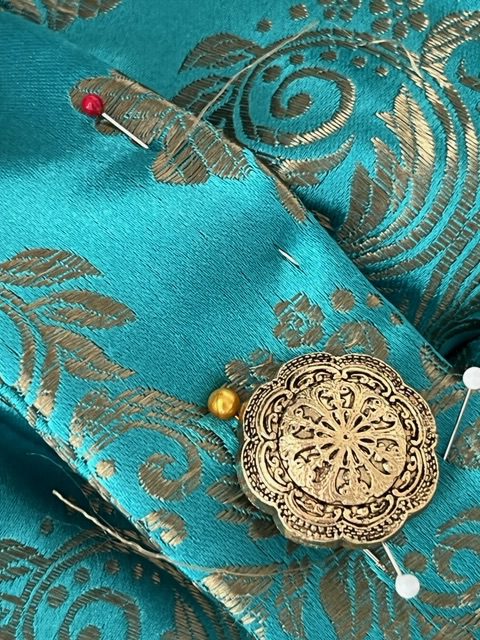
Loose threads 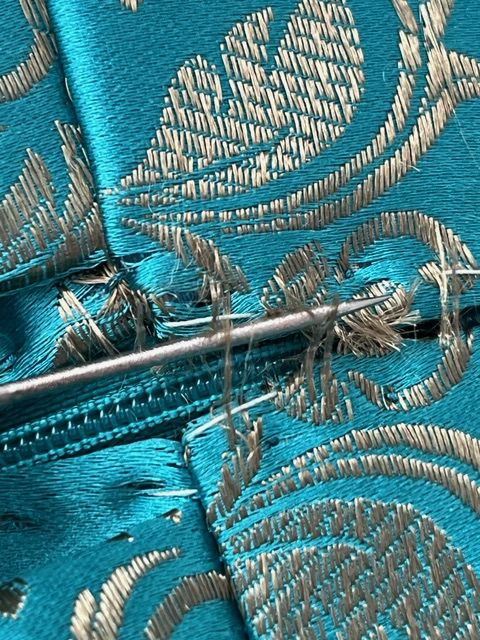
The worst of it! 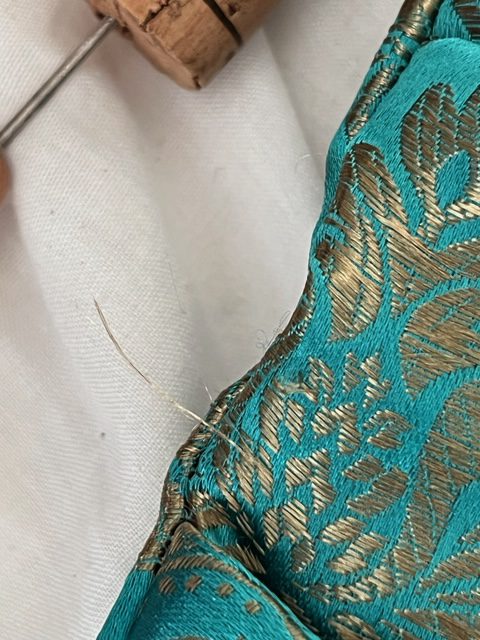
“Just wanna see what’s out there”, this scragglers says as it taunts me
- Serging. This is moreso my inexperience. If I had serged around the edges of the brocade that would have eliminated the need to zigzag around all the edges to prevent fraying. (7 pieces = time consuming as all heck!) Even with the narrow zigzag edges and I found myself stopping to give it “haircuts” multiple times throughout the sewing session.

Bah! Gosh darn you zig zag stitch 
Let’s play a game of “haircut and hide” 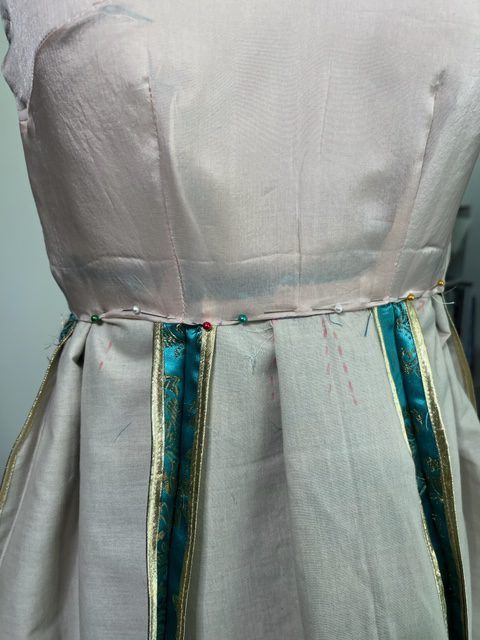
- Skirt fitting. The dress took me over a month to complete and at the time the size 6 waist was too tight. I ended up cutting a size 12. I have lost some body fat since then (5k training) so I now am probably a size 8. The waist is a little big and I cut off a whopping 1.5″ from both skirt sides. I still don’t think it fits as well and the sewing in that area looks pretty bad to my critical eye.
- The center front skirt is off by about 0.25″. I don’t know how I missed this during construction. It was probably when I was annoyed with all the snags and couldn’t see past it; fully knowing the dress had no wearable longevity.
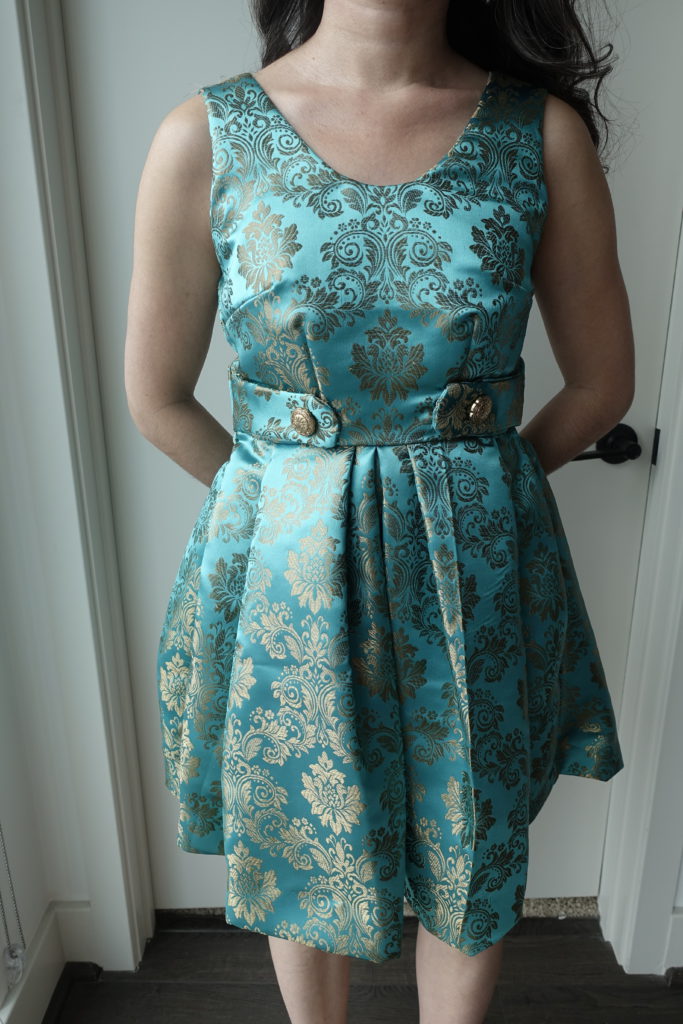
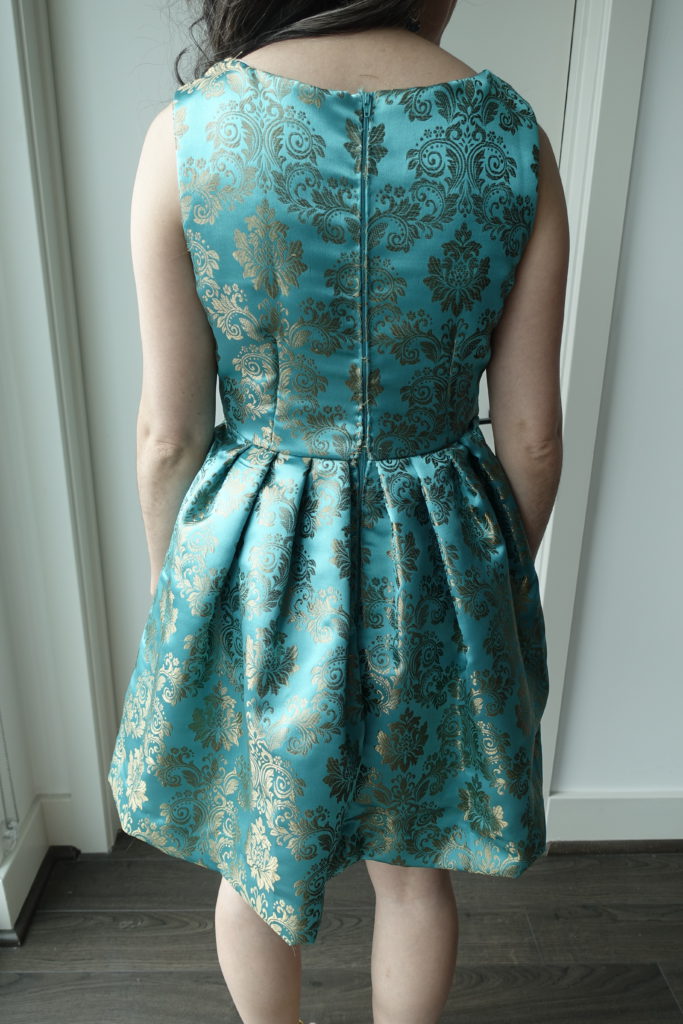
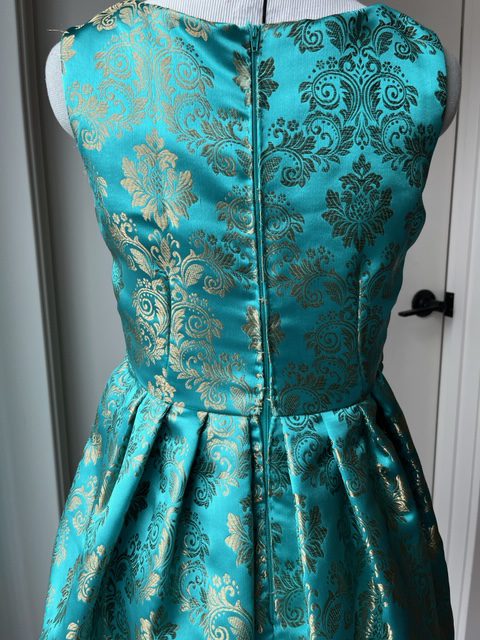
The dress is quite photogenic though. It’s a rich turquoise and gold color.
Final Thoughts:
- All the “not so great things” were mostly due to fabric choice and is not the fault of the pattern at all. I do love this pattern, the style and the TNT potential! I definitely have “unfinished business” and will try again with a better quality brocade. I also will sew it in a cool cotton to show off those amazing pleats.
I rated it 5/5 on Pattern Review.
Simplicity Misses’ & Miss Petite Dresses 1873 pattern review by RosieSews2

- It is an oxymoron, but I feel this dress is my best and worst work at the same time. I set out to sew stash specialty fabric and practice couture techniques which I did, but the sewing blips and snags are enough for me to not like the dress. Although it may not last more than two wears, I will still proudly hang this Monet Dress in my closet knowing I added more tools in the toolbox.


The Monet dress is spectacular!! Beautiful with those shoes!!!!!! 😉